Monday, 23 May 2011

The Exhibition

As part of this assignment each member of the class had to design a poster for our group exhibition.  In a previous post I showed my attempts.  Last week in class we voted on the poster design we want to use to advertise out show, and the winner was Chris with his brilliant design.
I think that choosing the poster design has been the most straightforward part of the exhibition planning too!

Before we could realistically design the poster we needed to know where and when the exhibition would be.  Finding somewhere that we could afford as a group on what was somewhat short notice proved nigh on impossible, the list was very short.  Another aspect we had to take into account was the availability of the entire class, and with holidays etc we had even less leeway.

Anyway, eventually we booked the Maltings, a creative arts centre in the heart of Farnham, Surrey.  The building was saved by the community in 1969 when Courage brewery sold it off, and today is comprised of a multitude of rooms available for hire.  We will be using the Long Kiln Room which is a light and airy space, perfect for our needs.

The exhibition itself will run from Friday the 10th to Sunday the 12th of June, with a private view on the Friday evening for invited guests only.
 
Now that the venue and dates are fixed, and the poster designed, we have to get down to the business of organising our pictures!  Thanks to a class member we have HP sponsoring our printing, they will be providing our images as A1 sized prints, ready for us to mount and hang.
We have decided to use foam board to mount the images as it is sturdy yet lightweight.  All the same it will be quite a job to get everything cut and stuck then hung!

It all seems quite daunting at the minute, especially when you're still not entirely sure what images you will be displaying (!) but once the photographs are up on the wall it will be thrilling.

the finished article

My book arrived from Photobox this week and I am very pleased with it!  The idea was to get as small a book as possible and measuring 7cm by 9.5cm it is pretty small.  The print quality looks good, which was a relief after having a disappointing result with a different publisher previously.

I have included here some images of the finished book, the focus is a little off in a couple but holding the book didn't leave me free to focus the camera!


In the end I decided not to make my own book too.  I have the bound printed book by Photobox and the individually mounted pictures in the green presentation box, plus the attempt I made at making my own was (to my mind at least) shockingly bad.  I thought it best to quit while I was ahead!

Monday, 16 May 2011

how to present the presentation boxes..........

I have now got two presentation boxes for my photographs.  The first is the green box pictured previously, containing a set of loose photographs beneath a lid with a magnifying lens.  The second is a book shaped box in which I will put my book (once it arrives from Photobox) and a small magnifying glass.
I have realised though that having little presentation boxes is all well and good until they get lost or dropped, and the green box being small with bits glued on the outside is especially vulnerable.  Today I bought a small cd storage box which I have modified to hold my creations, hopefully this will keep them safely together and intact.


Wednesday, 11 May 2011

just a couple more pictures......

I took a couple more pictures today, and this evening I will be putting together my book order.  I have decided to split the book into three sections, firstly will be the tilt-shift images, and this section will be entitled 'Little People'.  Next will be the model people, and this section will be named 'Big World'.  The third section will be the dictionary images and, as yet, it has no name.  I have toyed with the idea of calling it something dictionary related eg. Lexicon, but I'm not quite sure.

Anyhow, while I ponder that one, here are the last few images for the book....


Monday, 9 May 2011

more pictures and how to present the finished article

More Pictures

Today I played around with more of the dictionary pictures, but this time I used a full sized book as the tiny one was much to tricky and kept closing on my models, the poor things were being squashed!


How to present the finished article

I have two plans for my final product and I'm stepping away from the 'boring' book.  One will remain a secret until hand in and the other I will share with you now.
I plan to print my pictures on two-and-a-half inch squares and present them in a box.  The lid of the box contains a magnifying viewer, and has also been decorated in keeping with my theme.  See what you think:


Slinkachu

Back in a February post I mentioned Slinkachu.  His was the first work I had seen using the tiny OO/HO gauge people and I loved it.

His Little People project began in 2006.  It involves the remodelling and painting of miniature model train set characters, which he places, and leaves, on the street. It is both a street art installation project and a photography project.  He says 'The street-based side of my work plays with the notion of surprise and I aim to encourage city-dwellers to be more aware of their surroundings. The scenes I set up, more evident through the photography, and the titles I give these scenes aim to reflect the loneliness and melancholy of living in a big city, almost being lost and overwhelmed. But underneath this, there is always some humour. I want people to be able to empathise with the tiny people in my works'.

The High Life

Spilt Milk


These two are of a creation called 'Accident'.  In all of his Little People work Slinkachu shows a close shot as well as a shot or two showing the 'bigger picture' (pun intended!).  I particularly like this piece.


Monday, 2 May 2011

making my own book

I intend to get a book professionally printed, but I also want to try making my own as I intend to see just how small I can go.
Limitations I have are several, including how small the pictures can be and still be viewable, but part of this I intend to overcome in a novel manner... more later!

I had a quick attempt at making my own book this week, just a mock-up to see how it might look.  I used binding screws as (to me) they appear more sturdy than rivets.


Below are some pictures of my creation.  It is really quite shoddy but the rough idea is there!


I did say it was basic!!  I will fiddle with the design some more, and with the size too as I want it smaller if I can!
Back to my mention earlier about the size of the pictures and still being viewable.......  I intend to present the book with an attached mini magnifying glass, both for novelty and practical purposes.  I got hold of a couple of pocket ones from ebay, one is shown below.  I also got a couple of rectangular, wallet-sized magnifying cards, but they're not as good.


Sunday, 24 April 2011

Supermarket Sweep!

Finally got my supermarket shot today.  I have wanted an empty car park to take a long shot with the supermarket in the background, but in the end the shot I think that I'll use is the closer one.
It was going to mean a Sunday morning shoot, before 9am, to avoid cars and the chance of being run over.  However, Easter Sunday saw them closed all day, meaning no early start (hurrah) and the chance to get the pictures.
As I already said, I am leaning towards the closer shot, but any thoughts/suggestions would be most welcome.

The last photo is to give you an idea of the size of these models, they are tiny, and very light.  The artist and his easel had to be super-glued down as they kept blowing over!

just messing around

The images below were taken just for fun, although I have pondered a mini-project along similar lines.  These pictures won't be going into the final product but I thought I'd share them anyway!


Tuesday, 19 April 2011

Book styles and printing options

As the finished product from this assignment has to be presented in book form I have spent some time looking at different companies offering the 'photo book' product.  Having had a bad experience with Blurb I am keen to try someone else, and as I had a very nice book made last year by Cewe (via Jessops) I included them in my research.  I also looked at the likes of Bob Books, Lulu, Pixum, and Photobox.
As the project is all about scale I want to produce a small book, the smaller the better, so that was my first criteria.  Obviously price has to be considered, the number of minimum pages (as I am planning on having no more than 15-20 final images), as well as total production and dispatch times.
For each company I noted each of the aforementioned criteria and the basic list I have compiled reads :

Jessops  smallest book is 14x13cm, soft cover photo booklet.  Minimum of 26 pages, from £6.  Smallest hardcover is 15x19cm, from 26 pages again, from £19.  Free delivery is available to your local store and the advised total time from the start of production to delivery is 5-7 working days.

Bob books smallest book is 19x15cm, hardback is £21.99 and paperback £14.99, minimum of 26 pages again.  Delivery is £4.50 and takes 7-10 working days.

Lulu's smallest book is a whopping 23x18cm, hardback costs £13.81, paperback £7.25 with 20 pages.  There is no easy answer for shipping cost or delivery times etc..

Pixum offers a 19x15cm option also, with hardback costing £17.99, paperback £15.99, and booklet £9.99.  Once more a minimum of 26 pages, with postage costing £3.99 and production taking approx. 5 working days.

Photobox's smallest book is just 9x7cm, with a soft cover at £5.99.  It does have a minimum of 31 pages though.  They also have a small softcover book at 18x14cm, again minimum of 26 pages and costing £14.99.  Delivery is £1.99 and production to delivery takes approx. 4-7 working days.

Of the options I have looked at I will be choosing Photobox as the finished product looks perfect for the project.  I will keep you posted on how it goes!

More little people, and an experiment

 Here are a couple of the little people pictures for my book, I am tackling the more tricky ones later this week.


In my wanderings I found a little miniature English-French dictionary, amusingly enough it is also called Lilliput dictionary.  I have played around with some of my little people and created the images below.  I am pondering putting them into the book also and would appreciate any feedback.


Wednesday, 13 April 2011

Just found this, thought I'd share

Great picture of Giovanni Soldini, an Italian sailor who has become famous for lone sailing.
I found this image while researching the photographer Nadav Kander.  It's not the best quality but I hope that you can see the yachts and palm trees on his shoulder....

Tuesday, 12 April 2011

From Big to Small

This weekend I finished shooting one half of the project.  This half is taking pictures of real people and places and making them look like models.  I have really enjoyed this idea and am really pleased with the results.
I'm not going to reveal the final choices, but here are some more pictures from this final shoot.

Wednesday, 6 April 2011

Tilt-shift fun

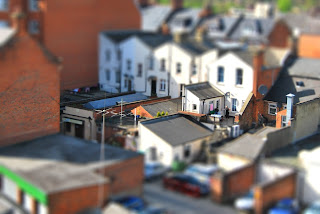
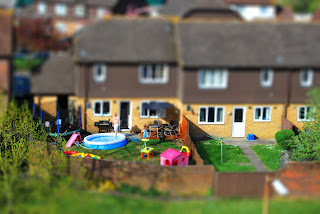
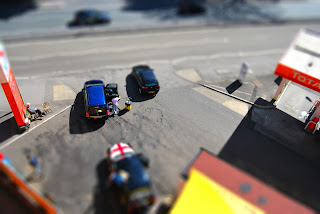
To alleviate Matt's panic about the actual photography side of this project I figured I should post some of my pictures.  As previously mentioned I am making half of the pictures for this project using tiny scale models and trying to make them appear life-sized, and the other half using life-sized scenes and making them look like models.

The latter is achieved by using the digital equivalent of a tilt-shift lens.  Here are the latest three images.  I really wasn't sure if the garage one would work, but I am happy with the result.